Organization on a Budget!
As of late, I've had quite the time trying to find different make-ups, lotions, brushes, ointments, etc. in all my various make-up bags. I've wished for some elaborate vanity to hold all my treasures that I just 'can't live without...ya' know?' (sarcasm)....BUT alas, I have expensive taste.... and even the non-expensive things are not in the budget right now.
Nonetheless, I was getting very frustrated with never being able to find what I needed regardless how many times I tried to organize and reorganize. So I perused pinterest and got some ideas; then I looked around my house for what I had, and vuala! I have my very own little beauty area right in my bedroom now. All you need to create yours are the following odds and ends:
SUPPLIES:
- Jars or cups of some sort- I used mason jars.
- Sturdy posterboard
- Cardstock
- Hot Glue
- Velcro squares
- Old fabric and/or thick ribbon
- An old bin of some sort (not necessarily needed- I just stored some non-essential things inside it
DIRECTIONS: (although it's self explanatory probably if you look at the picture. Nonetheless, I feel cool making a step-by-step 'directions tutorial.' :)
STEP 1: So, first I covered the green bin with some navy-polka-dot fabric that I had left over after making cat beds for the kitties. I also sewed together a strip of the fabric with a thick, sturdy, burlap ribbon and light blue thread. This created a long piece of fabric/ribbon made into three small little pouches. (See below picture if you're confused). I used velcro tabs on both ends of the long piece to attach it to the bin. Now it looks like it came with it, but alas, it did not. The pouches store various things that don't fit into perfect categories, and inside the bin are non-essential items that I don't use very often but would prefer to keep. (For ex: an old curling iron).
STEP TWO: Next, I gathered all the old mason jars I could find that were left from my wedding. I found a secret stash in a cabinet in the kitchen. I also used various jars that were left over from spaghetti sauces and such- After cleaning out the jars, I just organized the make up inside- not too creative or hard.

STEP 3: Then (my favorite part), I used the strong posterboard, and cut three rectangle pieces. I covered those pieces with card stock left over from previous craft projects/shower decorations. After that, I cut up the velcro squares into smaller squares and used velcro to attach various blushes, eye shadows, etc. to the strong poster board. After that, I mounted the poster board to the wall :).
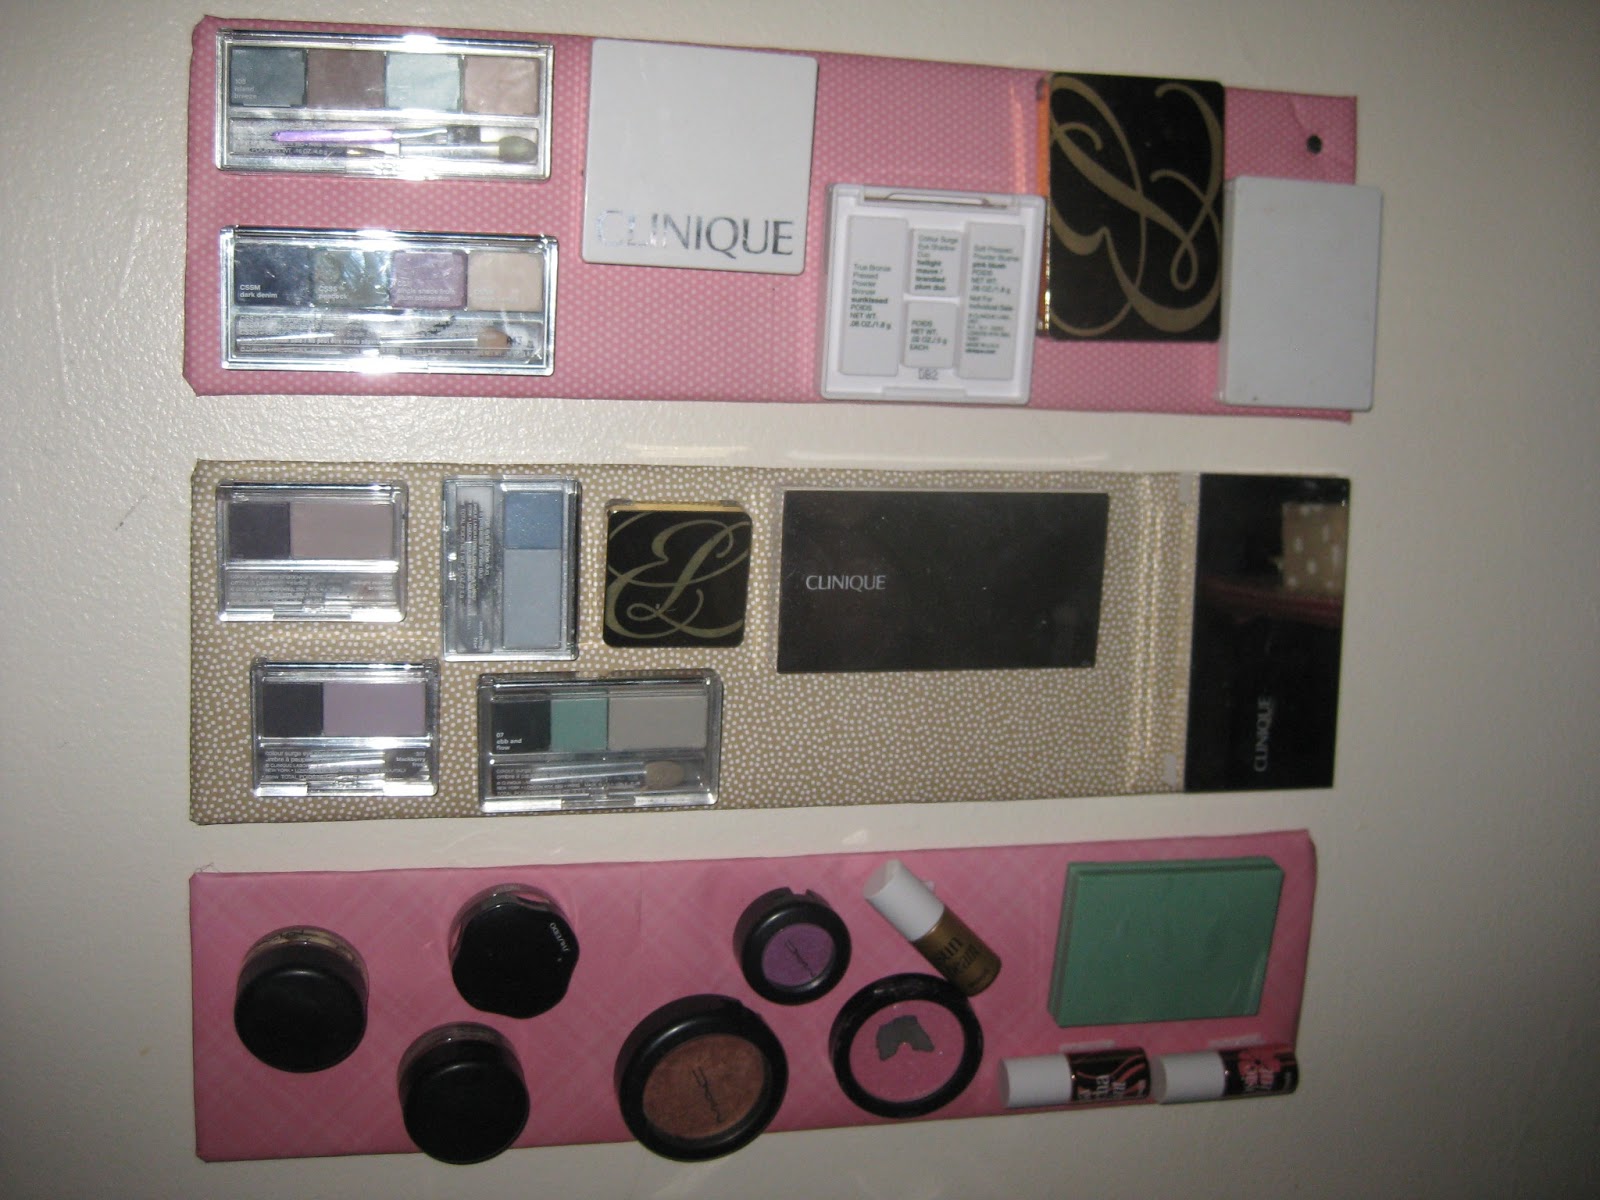
(I haven't completed this last step as of yet, but I am going to put a small label on each compact that does not show what colors are inside. This way I will know what each thing is without having to memorize it or pull it off and look first).
AND THEN: Final product! My own little make up area! :) Weeee. I can sit on the floor in front of my mirror (which is directly to the left) and use all my goodies :). (Sitting on the floor in front of the mirror to get dressed is a habit formed in college. Whitney and Cynthia can tell you all about it!)


Comments